Just as you can run Map Scans for Google Business Profile locations from Google Maps in Local Falcon, you can also run Map Scans for Apple Business Connect locations from Apple Maps. This allows you to gain insights into how any business listings you manage on Apple Maps are performing in the local rankings when people search for them using an iOS device.
Running Map Scans for Apple Maps Locations in Local Falcon works exactly the same as running scans for Google Maps locations — just keep in mind that you first have to import each Apple Maps location you want to run scans for, just as you do for each Google Maps location.
How to Import Locations from Apple Maps to Local Falcon
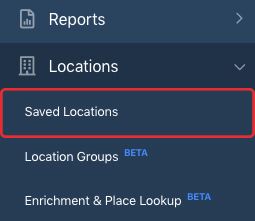
- Go to your "Saved Locations" from your account dashboard.
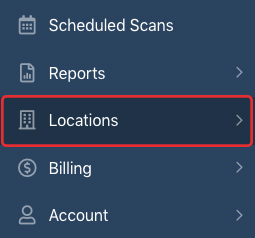
Log in to your Local Falcon account and go to your account dashboard, then click on the "Locations" drop-down in the main navigation menu and select "Saved Locations."
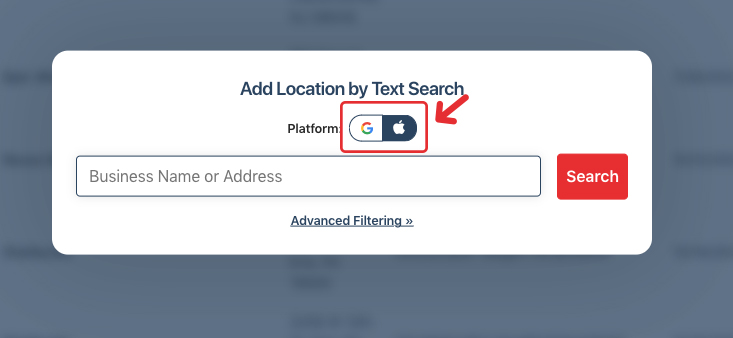
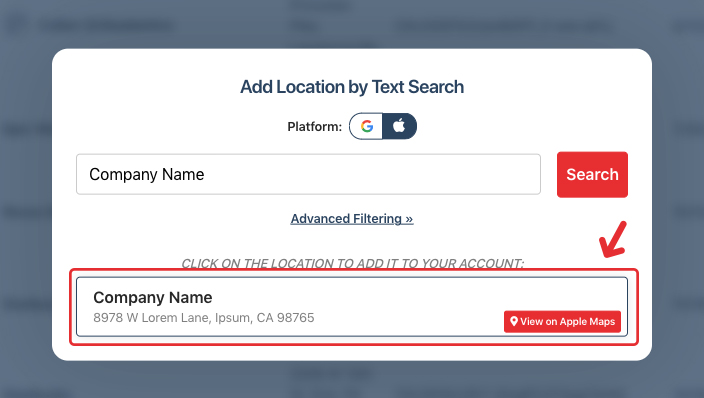
- Click the "Text Search" button.
This button appears at the top of the screen, right next to where it says "Add Locations:" Clicking the button will launch a text search pop-up, where you can search for and add business locations from different platforms.

- Toggle the platform selector to use "Apple Maps".
Click on "Apple Maps" to toggle the selection and start searching for Apple Business Connect locations.
- Search for a business location by name or address.
Type the business name or address into the search box to pull up the location you want to add.
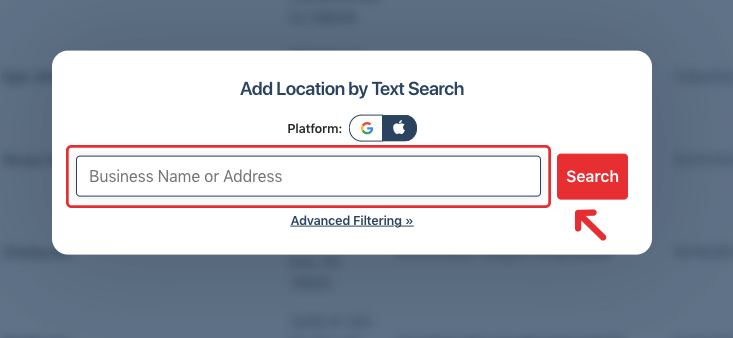
- Click the business location to add it to your saved locations.
After you add it, the location will appear alongside all the others in your saved locations. Each location will have a logo indicating which platform it's from, i.e., an Apple logo for business locations imported from Apple Maps.
How to Run a Rank Tracking Scan for an Apple Maps Location
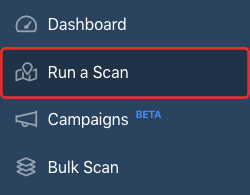
- Go to "Run a Scan" from your account dashboard.
Log in to your Local Falcon account and go to your account dashboard, then select "Run a Scan" from the main navigation menu.
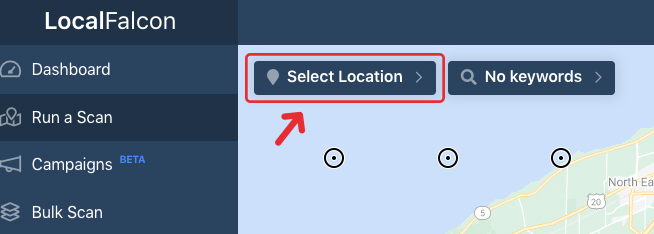
- Open up the locations drop-down at the top of the map.
Click the drop-down, which should be showing the name of the last business you ran a scan for, to pull up a list of your saved locations.
- Search for the Apple Maps location you want to run a scan for.
Type the name of the business location where it says "Filter Locations" or scroll through your list of locations to find it.
Note that if you haven't already added a location from Apple Maps to your Saved Locations using the method described above, you can also click the "Search" button at the bottom of the locations drop-down to do so.
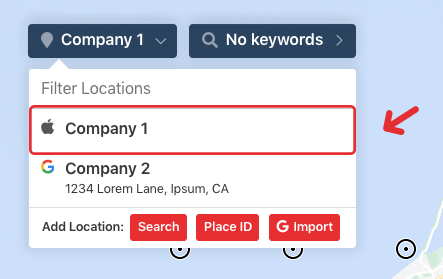
- Click on the location name to select it.
Once you see the location you want to run a scan for, simply click on it to select it for the Map Scan.
- Choose your Scan Settings.
Set your desired Map Scan Radius and Grid Size and add all the keywords you want to generate Scan Reports for. Remember you can always use the Suggested Keywords feature to save time.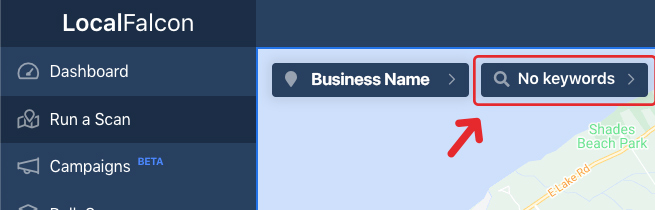
- Click the "Run Scan" button.
When you're happy with your Scan Settings, double-check them all and then hit the "Run Scan" button to run the Map Scan and generate Scan Reports using the chosen settings.

When viewing reports from your past scans, there will also be a platform logo indicating which platform the report is about.
Categories:Apple MapsMap Scan Tool
Tags:apple mapsmap scan toollocation import