How To Choose Scan Settings
There are various Scan Settings you can change in Local Falcon to help you gain the most insights from your Map Scans as well as optimize your credit usage. The primary settings you may want to change include the Map Scan Radius and Grid Size, the number of keywords scanned for, and the Scan Frequency. Before you decide on the specific settings you want to use for recurring Local Falcon Map Scans, we recommend running one or two "baseline" Map Scans, which will help you determine the best settings to use going forward.
Choosing Optimal Map Scan Settings
- Log in to your Local Falcon account
- Go to the Local Falcon homepage and click "Login" in the top right-hand corner, then enter the email address and password you used to create your account.
- Go to "Run a Scan"
- Select "Run a Scan" in the main navigation menu on the left-hand side of the screen.
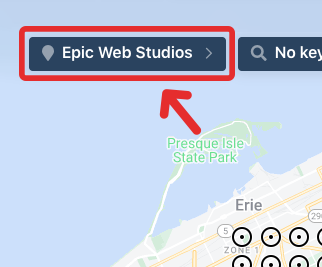
- Select the business location you want to run a Map Scan for
- The location drop-down is the first button at the top of the Map Scan screen.
- Any business locations you've imported from a connected Google account will appear here automatically, alongside any business locations you've previously run Map Scans for.
- If you don't see the business location you want to run a Map Scan for, click "Search" at the bottom of the drop-down and search for the location manually using the business name or address.
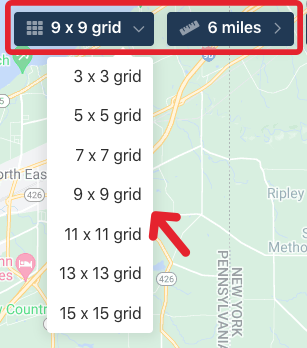
- Choose the Map Scan Grid Size and Grid Radius
- Set the Map Scan Grid Size and Grid Radius using the first two buttons at the bottom of the Map Scan screen.
- The Map Scan Grid Size sets the number of data points used for your Map Scan, while the Radius sets the distance between the center of the grid and the outermost data points. Your specific combination of Grid Size and Radius determines the distance between map pins (you can see the exact distance listed at the bottom of the map).
- We recommend starting with an 11 x 11 grid for the best data visualization, but a 9 x 9 grid also works well if budget is a big concern (each data point uses credits).
- Click on any data points located over water to disable them and avoid wasting credits (these data points are irrelevant).
- In general, the higher the population density, the lower the radius should be — 2 miles is a good starting point for businesses in urban areas, 5 miles in a suburban area and 10 miles is a good radius for businesses in rural areas.
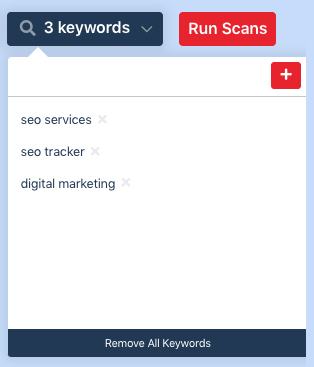
- Select the keywords to scan for
- The keywords drop-down is located right next to the business locations drop-down at the top of the Map Scan screen.
- You can either enter keywords manually or select keywords from the Suggested Keywords list (or both).
- Try to include one or two branded keywords (search phrases that include your business name), a few non-branded keywords (general search phrases), and some geo-specific keywords (search phrases that include different variations
- of the location of your business).
- You can run Map Scans for as few or as many keywords as you like, but around 10 is the most common number of keywords people scan for simultaneously.
- Run a baseline Map Scan and make adjustments
- After you've chosen your initial Scan Settings, click the "Run Scan" button at the top right-hand side of the screen.
- If you see a lot of red data points, especially around the edges of your grid, your Map Scan Radius is likely too big for that scan.
- When you find the right Map Scan Radius setting, most of the data points on your grid should be different shades of green and yellow (showing more precisely where your Local Rankings drop off).
- You can experiment and run a couple of baseline scans with different Scan Settings to optimize them for recurring Auto Scans that you want to schedule.
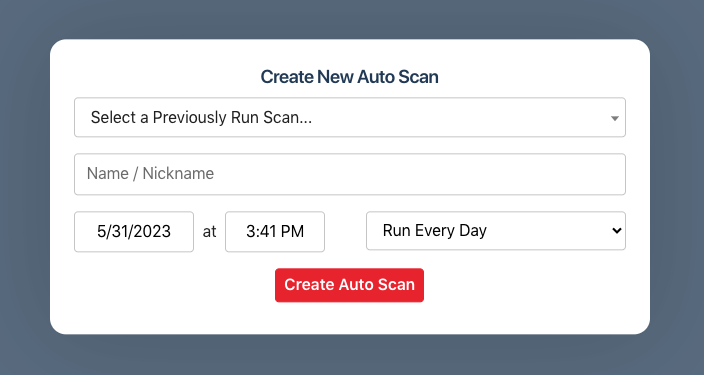
- Choose a frequency for Auto Scans
- The best way to schedule scans is to use Campaigns.
- You can, however, schedule individual scans through the "Scheduled Scans" menu item by clicking "Create New Auto Scan"
- Weekly and bi-weekly are the most popular, cost-effective frequencies, as these provide you with data at regular intervals without eating your budget too fast.
- If budget is a major concern, you might choose a monthly frequency.
- Auto Scans with a daily frequency have very niche use cases but aren't typically necessary for most users — such a high frequency will use up your credits very quickly without providing significantly more benefits than weekly or bi-weekly scans.
Category:Map Scan Tool
Tag:scan settings