Local Falcon's integration with Looker Studio (formerly Google Data Studio) allows you to turn your Local Rank Tracking data into powerful visual reports.
You can do this by sending individual Local Falcon Reports directly to Looker Studio from your Local Falcon Dashboard.
Looker Studio Templates make it even easier to choose what type of Report to send to Looker Studio to get the exact kind of data visualization you're looking for.
You can also download, edit, and share any Local Falcon Reports you send to Looker Studio.
Sending Local Falcon Reports to Looker Studio
- Log in to your Local Falcon account
- Go to the Local Falcon homepage and click "Login" in the top right-hand corner, then enter the email address and password you used to create your account.
- Open up the "Reports" drop-down
- Click "Reports" in the main navigation menu on the left-hand side of the screen.
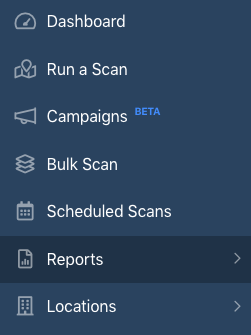
- Click "Reports" in the main navigation menu on the left-hand side of the screen.
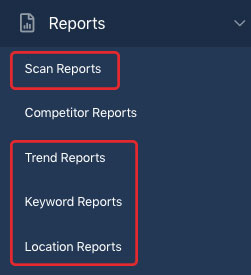
- Select a Report category from the drop-down
- You can choose either Scan Reports, Trend Reports, Keyword Reports, or Location Reports.
- Make sure you select a category for which you've previously run Reports in Local Falcon.
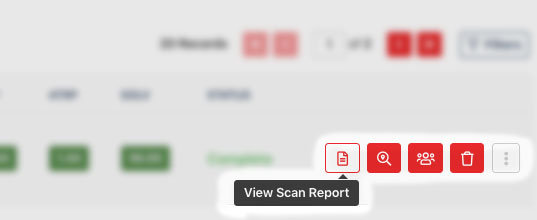
- Click the View Report button for the Report you want to send to Looker Studio
- The View Report button is the first button to the right of the Report details (the number of buttons you see and the View Report button's icon will be different depending on which Report category you selected).
- For example, if you choose the Scan Reports category, the View Report button will be indicated by a document icon (it will say "View Scan Report" if you hover over it).
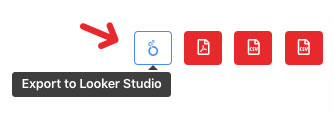
- Click the Export to Looker Studio button in the top right-hand corner
- Note that this button only appears if you have already connected your Local Falcon account to a Looker Studio account (you must also be on Local Falcon's Basic plan or higher to use the Looker Studio integration).
- The Export to Looker Studio button is indicated by an icon of the Looker Studio logo and says "Export to Looker Studio" if you hover over it.
- Clicking this button instantly sends the selected Report to your connected Looker Studio account and generates a preview of the Report on your screen, which takes just a few seconds to populate.
- Click "Edit and share" when the Report is done loading
- This creates a local copy of the Report that you can edit and share with anyone you want.

- This creates a local copy of the Report that you can edit and share with anyone you want.
Using Looker Studio Templates
- Log in to your Local Falcon account
- Go to the Local Falcon homepage and click "Login" in the top right-hand corner, then enter the email address and password you used to create your account.
- Open up the "Developer" drop-down
- Click "Developers" in the main navigation menu on the left-hand side of the screen.
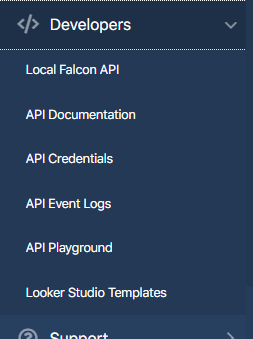
- Click "Developers" in the main navigation menu on the left-hand side of the screen.
- Select "Looker Studio Templates" from the drop-down
- Note that you must be on a Basic Local Falcon plan (or higher) and logged in with any Google Account to use Looker Studio Templates.
- If you are not currently on a paid plan, you will be prompted to upgrade your plan in order to view the Looker Studio Template Gallery.
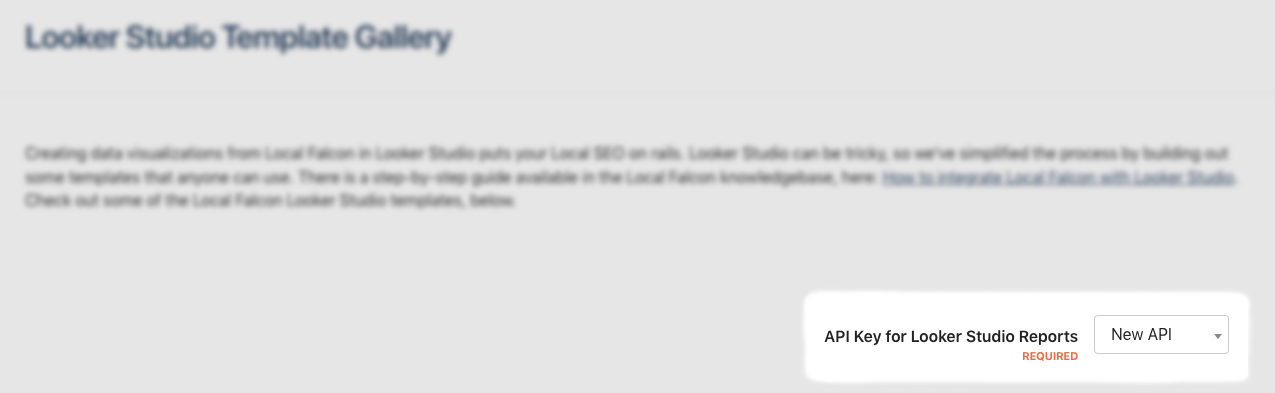
- Select an API Key for Looker Studio Reports
- Upon creating your account (or upgrading), the Local Falcon system will automatically create a default API Key for you. You can use this, or you can generate a new key from the "API credentials" page.
- You can also use the API Key you generated when you connected a Looker Studio account to your Local Falcon Dashboard.
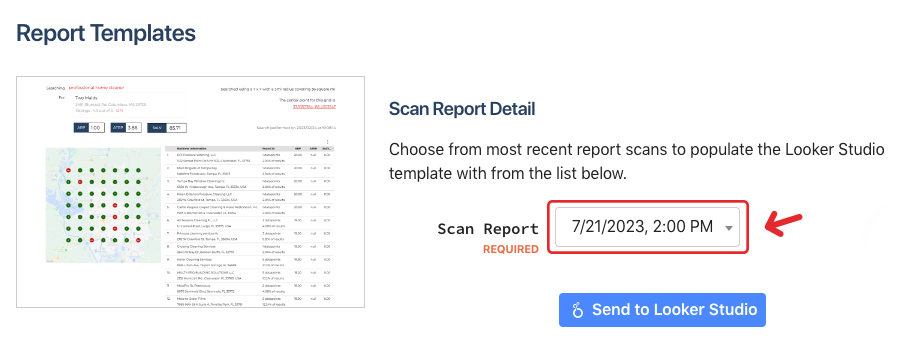
- Choose a Report Template from the Looker Studio Template Gallery
- There are Looker Studio Templates for most of the different types of Local Falcon Reports, including Scan Reports, Trend Reports, Keyword Reports, and Location Reports.
- Select a Report you want to send from the "Previously Run Reports" drop-down
- All the recent Reports you've run of your chosen type will appear in this drop-down along with their key details, including business names, location addresses, keywords, and Report dates.
- All the recent Reports you've run of your chosen type will appear in this drop-down along with their key details, including business names, location addresses, keywords, and Report dates.
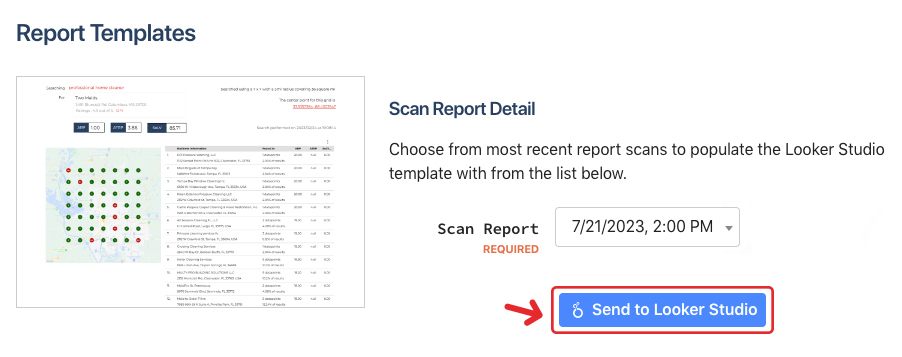
- Click "Send to Looker Studio"
- The "Send to Looker Studio" button is directly below the "Previously Run Reports" drop-down.
- Clicking this button instantly sends the selected Report to your connected Looker Studio account and generates a preview of the Report on your screen (using your chosen template), which takes just a few seconds to populate.
- Click "Edit and share" when the Report is done loading
- This creates a local copy of the Report that you can edit and share with anyone you want.

- This creates a local copy of the Report that you can edit and share with anyone you want.
Category:Reporting
Tags:looker studioreportingintegrations