Local Falcon tracks your business's visibility across leading AI search platforms, including Google AI Overviews, Google AI Mode, Gemini, ChatGPT, and Grok, using the same geo-grid scan format used for traditional Google Maps and Apple Maps local rank tracking. There are two ways to run AI visibility scans: Quick Scans for one-off checks, and Campaign Scans for automated, ongoing monitoring. This guide covers both methods.
Quick Scans for AI Visibility
Quick Scans are the fastest way to get an immediate snapshot of how your business appears in AI-generated results for a specific keyword and location. Use them when you want to check a single platform, test a keyword, or run a one-time report without setting up recurring tracking.
Running a Quick Scan To Check Your AI Visibility
Step 1: Log in to your Local Falcon account
Go to localfalcon.com and sign in using your credentials.
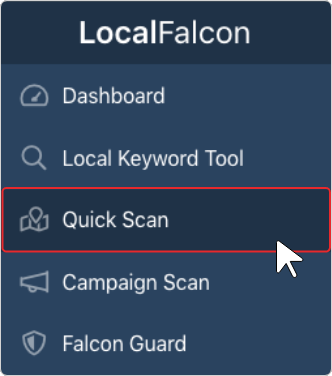
Step 2: Go to "Quick Scan" from your dashboard
Select "Quick Scan" from the main navigation menu on the left-hand side of the screen. Quick Scans let you run one-time scans on demand. Keep in mind that you can only run a Quick Scan for one location and platform at a time, for as many keywords as you want.
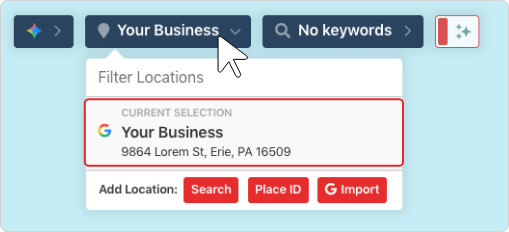
Step 3: Select your business location
Choose a business from your list of saved locations using the location drop-down at the top of the scan screen. If the location isn't in your list yet, you can add it by searching for it by name or address, by entering a Google Place ID, or by importing it from a connected Google account.
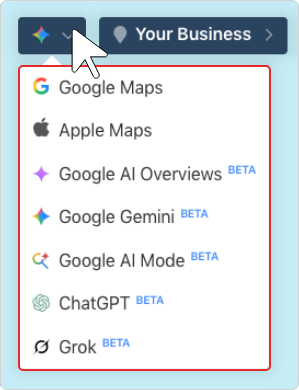
Step 4: Select an AI visibility platform as your data source
Look for the data source drop-down in the top left-hand corner of the scan map, next to the business location drop-down. Click it and select the AI platform you want to scan — Google AI Overviews, Google AI Mode, Gemini, ChatGPT, or Grok.
Tip: You can only select one data source per Quick Scan. To track your visibility across multiple AI platforms, you'll need to run separate Quick Scans for each — or use a Campaign Scan (see below), which lets you track multiple sources in a single setup.
Step 5: Enter your keywords
Click the keyword field and type in the search terms you want to scan for. We recommend using long-tail, conversational keyword phrases, as these more closely reflect how users actually query AI platforms and are more likely to trigger AI-generated results.
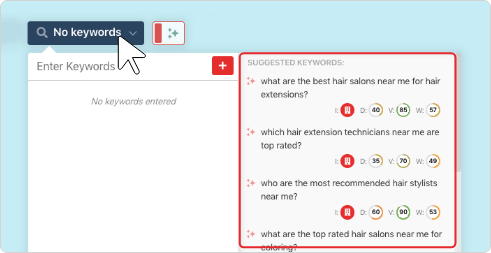
Tip: You can also check Suggested Keywords for AI-generated keyword ideas and search terms your business is already associated with, or use the Local Keyword Research Tool to generate a targeted list of AI-style queries and prompts.
Step 6: Set your Grid Size and Scan Radius
Set the Map Scan Grid Size and Radius using the controls at the bottom of the scan screen. The Grid Size determines the number of data points in your scan grid, and the Radius sets how far out from the business location the outermost scan points will be placed. If there are grid points located over water or other irrelevant areas, click them to disable and avoid wasting credits.

Tip: An 11x11 grid is a good starting point for the best data visualization. For radius, consider your market type: 2 miles works well for urban areas, 5 miles for suburban, and 10 miles for rural.
Step 7: Click "Run Scan"
Once everything is configured, click the "Run Scan" button to begin. AI visibility scan times can range from a few seconds to several minutes depending on the number of keywords, grid size, and platform response times. You'll receive a notification when your scan is complete.

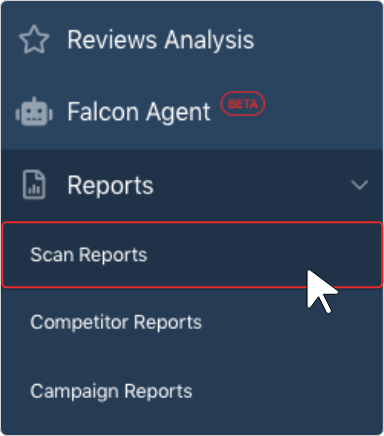
Step 8: View your AI Visibility Scan Report
Navigate to your Scan Reports to view your results. Your AI Visibility Scan Report will show whether your business appeared in AI-generated results across the grid, along with key metrics including:
- Share of AI Voice (SAIV): How often your business is mentioned in AI-generated results across the scanned area.
- Average Rank Position (ARP): The average position your business appears in when mentioned.
- Buyer Persuasion Score (BPS): How positively or negatively the AI platform characterizes your business, on a scale from -10 (strongly discourages) to +10 (strongly recommends).
You can also review the Brand Information section to see which competitors appeared in results, the Brand Phrases section to see what phrases AI associates with your business (plus the sentiment behind each), and the Source Information section to see which web pages the AI platform pulled from to generate its results — useful for understanding how to improve your visibility.
Note: You can schedule a recurring Auto Scan directly from the report screen if you want to track that same location and keyword on a regular basis without setting up a full Campaign.
AI Visibility Campaign Scans
Campaign Scans let you automate AI visibility tracking across multiple business locations, keywords, and AI platforms — all from a single setup. Once configured, your Campaign will run scans at your chosen frequency and generate updated reports automatically, making Campaigns ideal for agencies, multi-location businesses, and anyone who needs consistent, hands-off AI visibility tracking over time.
Tip: We recommend running a few Quick Scans first to identify which keywords and grid settings work best for your locations before setting up a Campaign.
Creating a New AI Visibility Campaign
Step 1: Log in to your Local Falcon account
Go to localfalcon.com and sign in using your credentials.
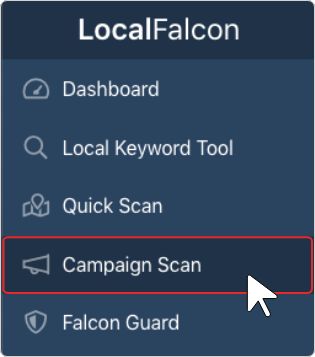
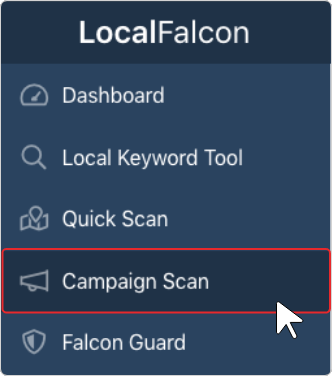
Step 2: Go to "Campaign Scan" from your dashboard
Select "Campaign Scan" from the main navigation menu on the left-hand side of the screen.
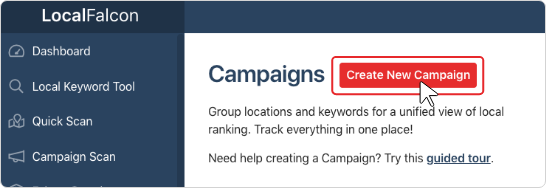
Step 3: Click "Create New Campaign"
This button is located at the top of the Campaign Scans screen. Any Campaigns you've previously created will also be displayed here and can be edited at any time.
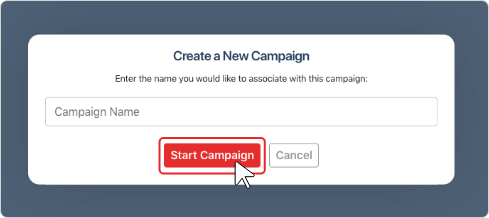
Step 4: Name your Campaign
Type a name into the text box, then click "Start Campaign."
Tip: Give your Campaign a name that makes it easy to identify which business location(s) or AI platform(s) it's tracking — especially helpful if you're managing multiple Campaigns.
Step 5: Set your Grid Size and Scan Radius
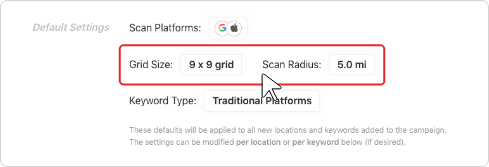
Select your default Grid Size and Scan Radius from the "Default Settings" section. These defaults are initially applied to all locations in the Campaign, but can be adjusted per location in a later step.
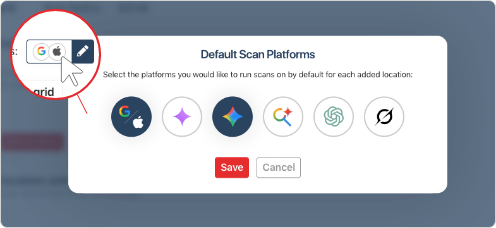
Step 6: Select your AI visibility data sources
Choose the AI platforms you want to track from the list of available data sources. You can select any combination of Google AI Overviews, Google AI Mode, Gemini, ChatGPT, and Grok — and you can also include traditional platforms like Google Business Profile or Apple Business Connect in the same Campaign if desired.
Simultaneously tracking visibility across multiple AI sources and locations in a single Campaign is one of the biggest advantages of using Campaign Scans over individual Quick Scans.
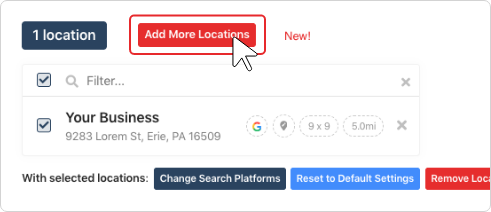
Step 7: Add your business locations
Click "Add More Locations" and select any existing locations (or Location Groups) from the pop-up. You can search by name or address, or add new locations via Text Search, Google Place ID, or by importing from a connected Google account. After adding locations, you can customize the Grid Size and Radius for individual locations as needed.
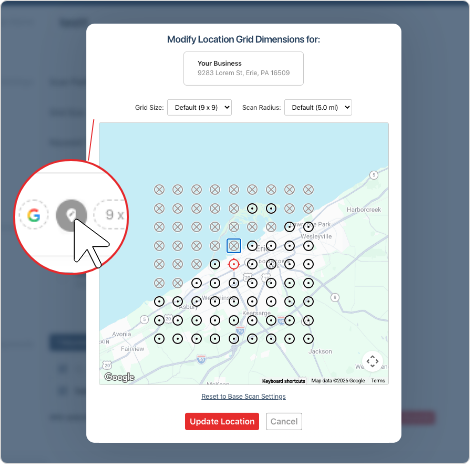
Step 8: Disable any unwanted grid points
Click the "Modify Map Grid" button next to any location to disable individual grid points — useful for removing data points over water or outside your target area.
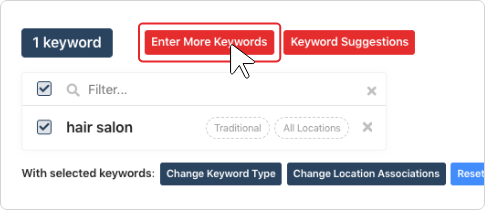
Step 9: Add your keywords
Click "Enter More Keywords" and type your keywords into the pop-up, separated by commas, then click "Add Keywords." After adding keywords, you can:
- Assign keywords to specific locations — click the location settings next to a keyword to specify which location(s) it should be scanned for.
- Specify which keywords to scan for which platforms — you can designate whether each keyword should be scanned for traditional local search platforms, specific AI visibility platforms, or both. This lets you use different keyword strategies for different sources within the same Campaign.
Tip: Remember to use conversational, natural-language keyword phrases for AI visibility scans, as these reflect how users actually query and prompt AI platforms and are more likely to trigger AI-generated responses than the types of short-tail keywords people use for Google Search and Maps.
Step 10: Configure Falcon AI analysis
In the "Additional Options" section, ensure "Yes" is selected next to "Generate AI Analysis on Campaign?" if you want Falcon AI to automatically provide in-depth AI visibility analysis and optimization recommendations with every Campaign Report.

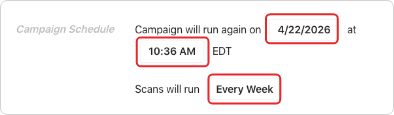
Step 11: Set your Campaign schedule
Choose a Campaign start date, scan frequency, and scan time:
- Frequency: Weekly or bi-weekly are the most popular options, providing regular data without consuming credits too quickly. If you prefer monthly data, you can choose "every 4 weeks" to ensure scans always run on the same day of the week or "monthly" to always run them on the same date.
- Time: Schedule scans for a time when all locations in the Campaign are open, especially if tracking Google Business Profile or Apple Business Connect rankings in the same Campaign.
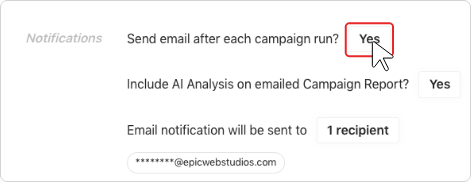
Step 12: Set up a Campaign Report notification email (optional)
If you want yourself or other stakeholders to receive an automatic email notification after each Campaign Scan run, use the "Notifications" section and fill out the sender name, reply-to email, subject, body text, and recipient fields. Click "Preview Notification Email" to review what the notification email will look like.
Your AI visibility tracking Campaign is now set up and will run automatically on your chosen schedule. Each time it runs, a new Campaign Report will be generated as well as individual Scan Reports. Your Trend Reports for each location-keyword combination will also be updated automatically, giving you a continuously growing picture of how your AI visibility changes over time at a granular, hyperlocal level.
Editing an Existing AI Visibility Campaign
Step 1: Log in and go to "Campaign Scan"
Select "Campaign Scan" from the main navigation menu.
Step 2: Find and click into the Campaign you want to edit
All your existing Campaigns are displayed on this screen. Click the "Edit Campaign" button (indicated by a pencil icon) next to the Campaign you want to update.
Step 3: Make your changes
You can update any setting, including adding or removing locations and keywords, adjusting Grid Size and Scan Radius, enabling or disabling grid points, updating AI visibility data sources, modifying the scan schedule, and turning the notification email on or off.
Step 4: Click "Update Campaign"
This saves all changes and your Campaign will continue running on its updated settings going forward.
Related Articles:
- How To Read an AI Visibility Scan Report
- How To Run a Quick Scan in Local Falcon
- How To Schedule Scans Using Campaigns in Local Falcon
- How To Track Your AI Visibility in Google AI Overviews
- How To Track Your AI Visibility on ChatGPT
- How To Track Your AI Visibility on Gemini
- How To Track Your AI Visibility on Google AI Mode
- How To Track Your AI Visibility on Grok
- How To Use Share of AI Voice (SAIV)
- How To Use Buyer Persuasion Score (BPS)
Category:Map Scan Tool
Tags:ai visibilityai visibility scans